MicroK8s

VMware Workstation Player上のXubuntu 22.04にMicroK8sをインストールします。
ネットワークはNAT。
なぜなら、Maltipassを使って、マルチノードを構成するから。
ブリッジ接続にすると、仮想の入れ子が深くなって大変。
Mutipass

マルチモードで構成。
| VM名 | コア数 | メモリ容量 | デスク容量 |
| master | 2 | 4GB | 40GB |
| worker01 | 2 | 4GB | 40GB |
| worker02 | 2 | 4GB | 40GB |
インストール
$ sudo snap install multipass
作れるインスタンスをチェック
$ multipass find
ubuntu 22.04 LTSで行く。
インスタンス作成
$ multipass launch 22.04 --name master --cpus 2 --memory 4G --disk 40G
$ multipass launch 22.04 --name worker01 --cpus 2 --memory 4G --disk 40G
$ multipass launch 22.04 --name worker02 --cpus 2 --memory 4G --disk 40G
MicroK8sインストール
$ multipass shell master
$ sudo snap install microk8s --classic
$ sudo usermod -a -G microk8s $USER
$ chown -f -R $USER ~/.kube
$ exit

$ multipass shell worker01
$ sudo snap install microk8s --classic
$ sudo usermod -a -G microk8s $USER
$ chown -f -R $USER ~/.kube
$ exit

$ multipass shell worker02
$ sudo snap install microk8s --classic
$ sudo usermod -a -G microk8s $USER
$ chown -f -R $USER ~/.kube
$ exit
ノード追加
マスターノードでmicrok8s add-node。
表示されたmicrok8s join … を、ワーカーノードで貼り付け。
worker01
$ multipass shell master
$ microk8s add-node
Use the '--worker' flag to join a node as a worker not running the control plane, eg:
microk8s join 10.2.177.133:25000/dd67b97139821edf42037aad6c63ce59/adc031ed3d54 --worker
$ exit

$ multipass shell worker01
$ microk8s join 10.2.177.133:25000/dd67b97139821edf42037aad6c63ce59/adc031ed3d54 --worker
$ exit
worker02
$ multipass shell master
$ microk8s add-node
Use the '--worker' flag to join a node as a worker not running the control plane, eg:
microk8s join 10.2.177.133:25000/ad8b4830750fd4cb0eb00fa8934e2128/adc031ed3d54 --worker
$ exit

$ multipass shell worker02
$ microk8s join 10.2.177.133:25000/ad8b4830750fd4cb0eb00fa8934e2128/adc031ed3d54 --worker
$ exit
コメント
The node has joined the cluster and will appear in the nodes list in a few seconds.

This worker node gets automatically configured with the API server endpoints.
If the API servers are behind a loadbalancer please set the '--refresh-interval' to '0s' in:
    /var/snap/microk8s/current/args/apiserver-proxy
and replace the API server endpoints with the one provided by the loadbalancer in:
    /var/snap/microk8s/current/args/traefik/provider.yaml
確認
$ multipass shell master
$ microk8s kubectl get nodes
NAME       STATUS   ROLES    AGE     VERSION
worker01   Ready    <none>   14m     v1.27.4
master     Ready    <none>   45m     v1.27.4
worker02   Ready    <none>   5m47s   v1.27.4
Kubernetes cluster manager
$ multipass shell master
$ sudo snap alias microk8s.kubectl kubectl
$ kubectl
kubectl controls the Kubernetes cluster manager.
 Find more information at: https://kubernetes.io/docs/reference/kubectl/
 ...
$ exit
Helm 3

$ multipass shell master
$ sudo snap install helm --classic
$ exit
公開鍵・秘密鍵 作成
$ ssh-keygen
$ cd .ssh
$ cat .ssh/id_rsa.pub
公開鍵をコピー
$ multipass shell master
$ nano .ssh/authorized_keys
行末に貼り付け
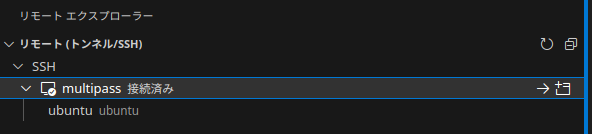
Visual Studio Codeインストール
UserはUbuntu